How to use Active Directory to deploy the Prometheus Windows Exporter
May 19, 2025

Prometheus Deployment with Active Directory
If you are using Prometheus for Windows monitoring, you will have encountered the setup process for installing the Windows Exporter on each host, where you have to run the MSI installer on each server to get the service running.
Whilst not a huge headache for a few servers, the time and effort of clicking through manual MSI installations adds up.
However, if the servers are Active Directory domain members, AD has a built in mechanism that can take care of this.
Publishing with Active Directory
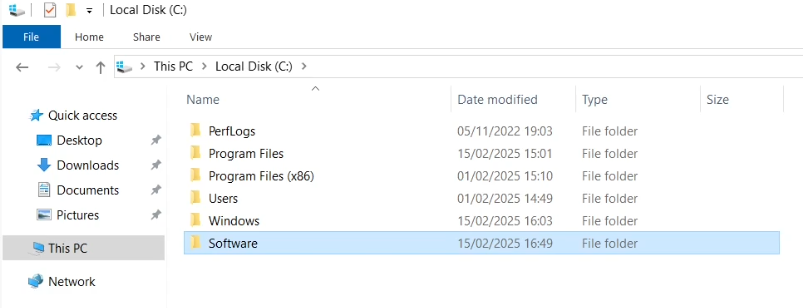
To get started, first create a folder on your domain controller from which to share the exporter software, eg C:\Software.
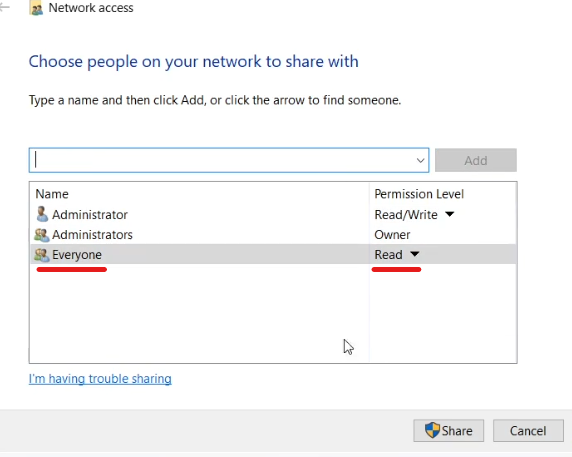
Share the folder, and select “Everyone” with read access. Make note of the network share name, “\\DemoDC1\Software” in this example.
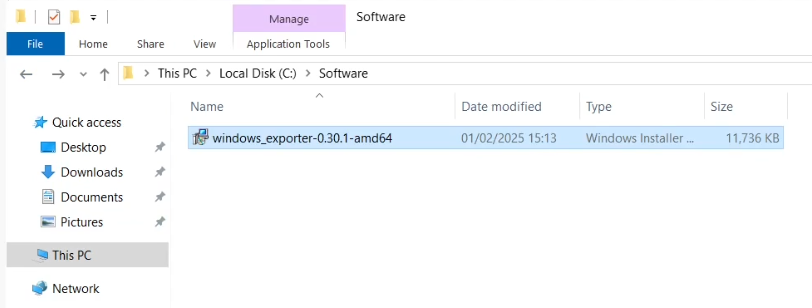
Copy the Prometheus Windows Exporter to the shared folder.
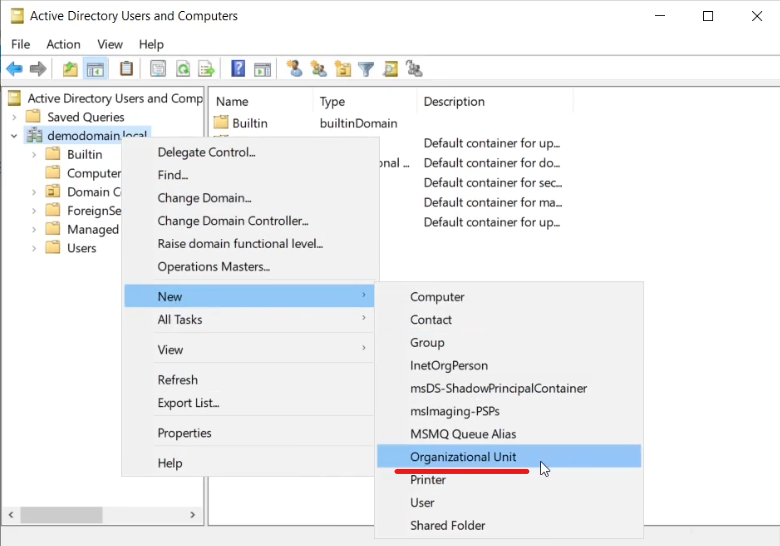
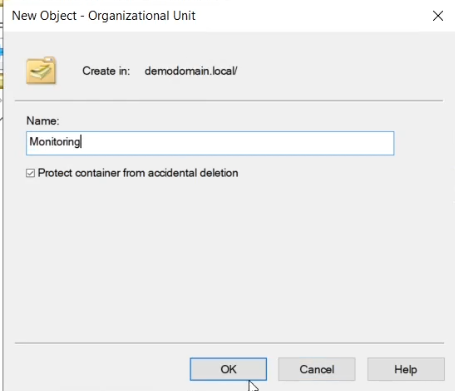
To configure where the exporter is deployed to, you may want to create an Organisational unit that the Group Policy you will create (see below) will be assigned to. Open Active Directory Users and Computers, select the domain, right-click and select New->Organizational Unit, then name the new OU and click OK.
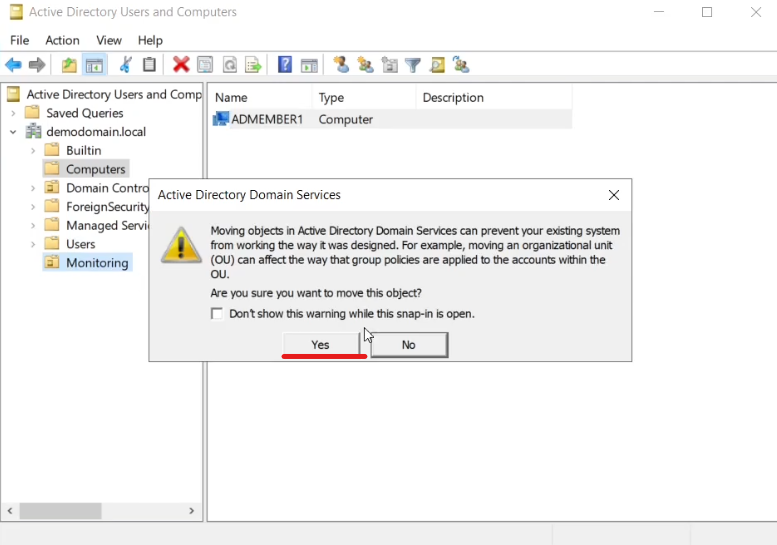
Add the computers that you want to run the Prometheus Windows Exporter on to the Organizational Unit (you may be prompted to confirm).
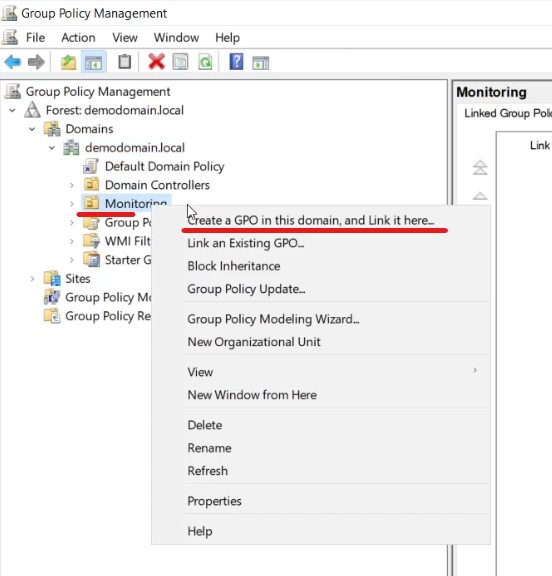
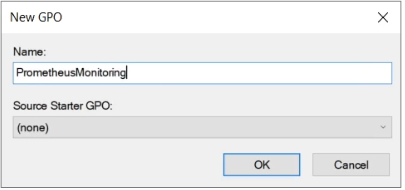
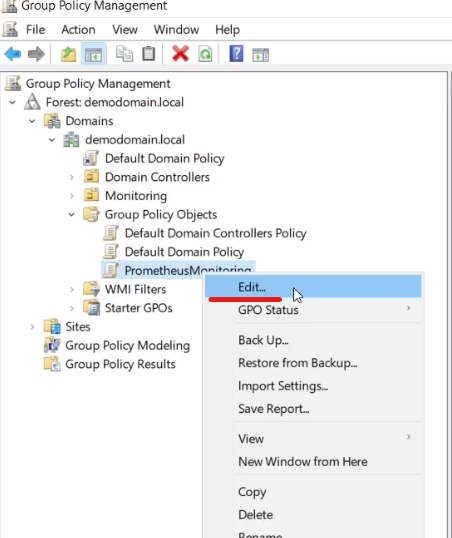
Open Group Policy Management, select the OU under the domain and select “Create a GPO in this domain and link it here” and then name it.
Edit the policy, which should open the Group Policy Management Editor.
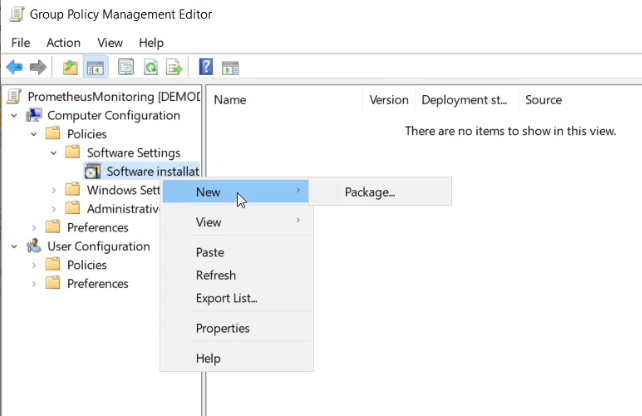
Expand Computer Configuration -> Policies -> Software Settings -> Software Installation, right-click and select New -> Package.
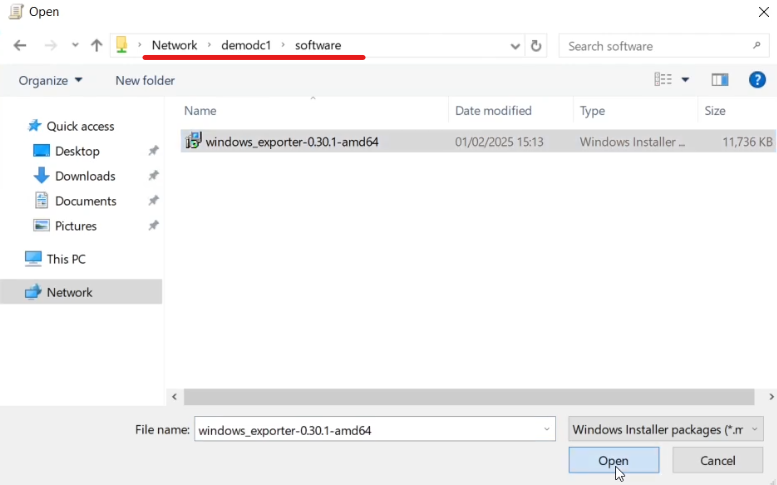
Browse to the Windows Exporter MSI file, making sure to do so using the network path, eg \DEMODC1\Software, and NOT C:\Software.
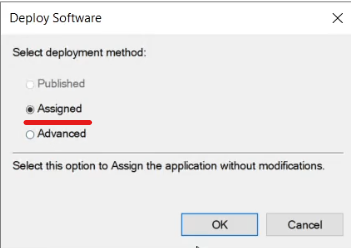
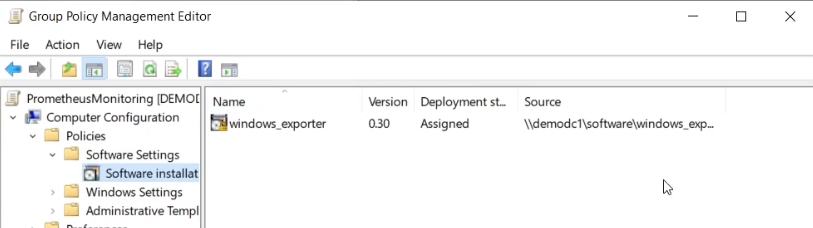
The Deploy Software wizard will launch - select “Assigned” and click OK.
The exporter package will now be shown, together with the network path to the application.
If you are running a Windows Firewall (and you should be), you need to add an exception for the Windows Exporter to allow inbound connections.
Expand Computer Configuration -> Policies -> Windows Settings -> Security Settings -> Windows Defender Firewall -> Windows Defender Firewall, right click on Inbound Rules and select “New Rule”.
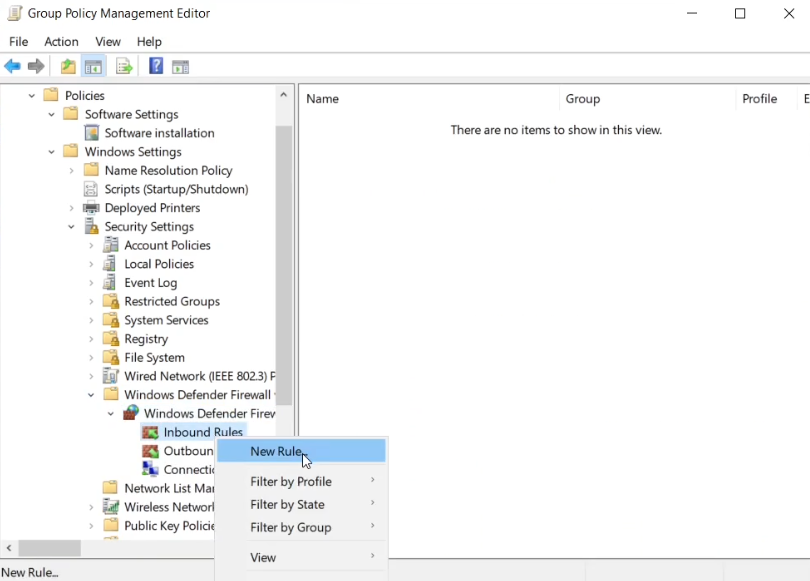
The New Inbound Rule Wizard should launch. Select “Port” and click Next.
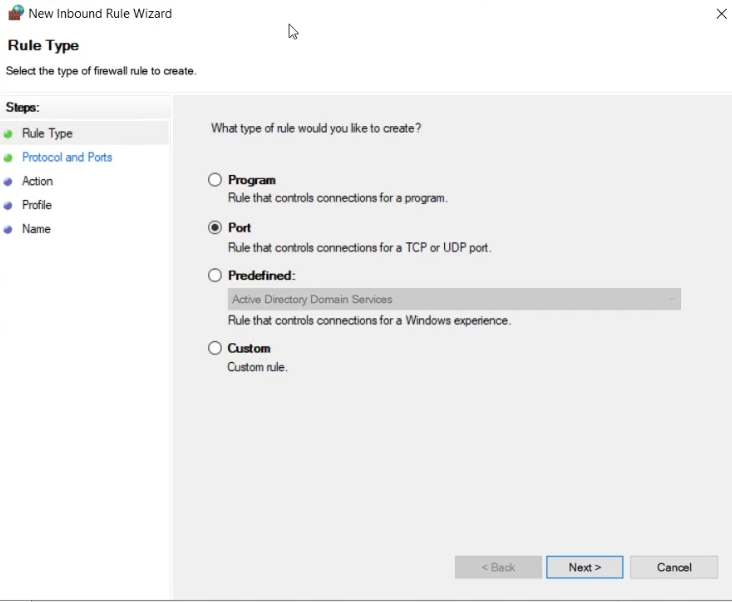
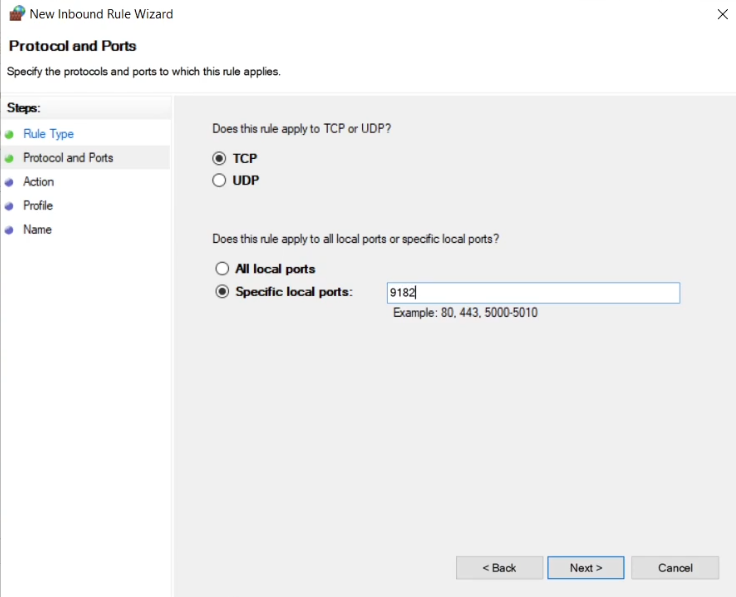
Select “TCP” and enter “9182” in the “Specific local ports” field, then click Next.
Select “Allow the connection” and click Next.
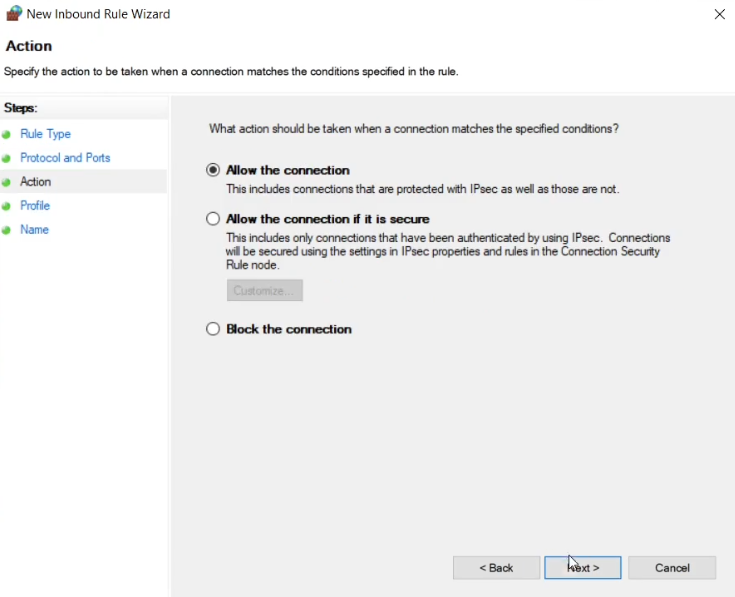
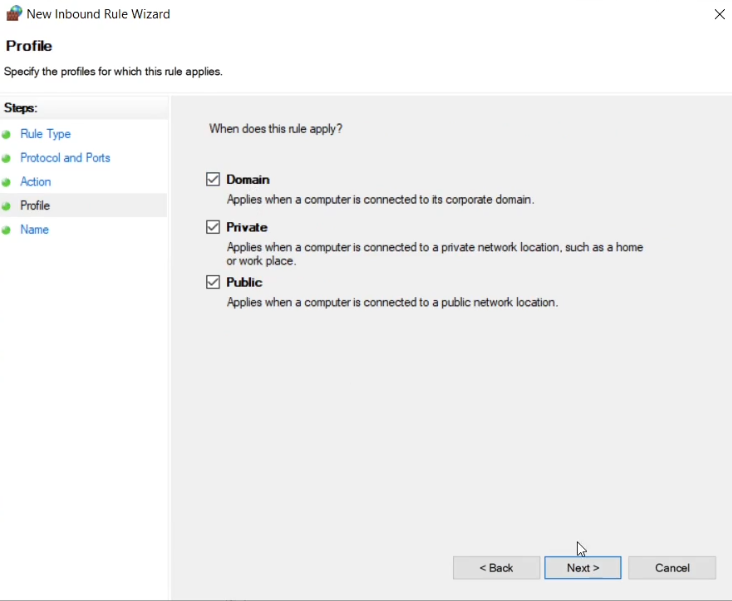
Select the network categories that the rule should apply to, and click Next.
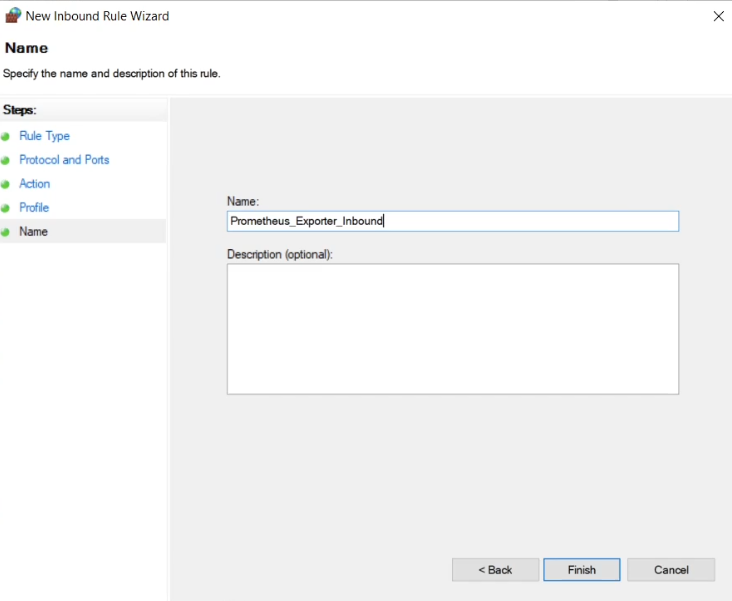
Enter a name for the rule, eg “Prometheus_Exporter_Inbound” and click Finish.
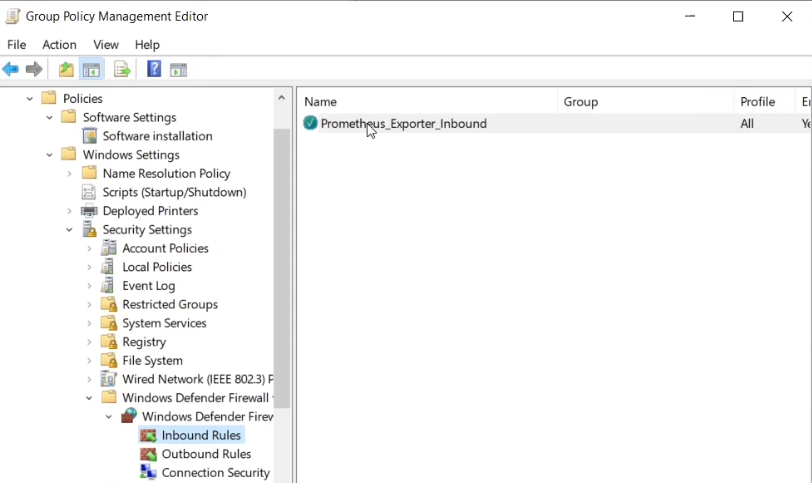
The rule will then be shown in the Group Policy Management Editor.
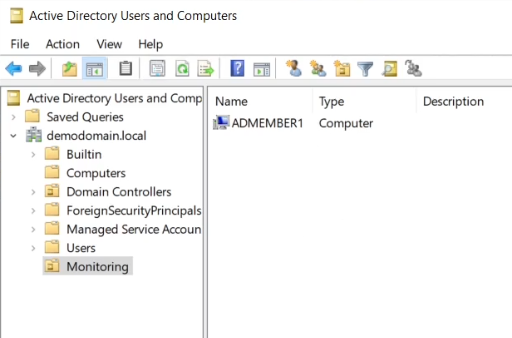
The policy is now configured, and has been linked to the OU. Confirm which machines you expect to have the Exporter assigned to them by checking the OU in Active Directory Users and Computers.
You should now run “gpupdate /force” on the machine(s) in the relevant OU for them to get the software. They may need to reboot, which should also apply the group policy.
Note: More complex Active Directory environments may take some time to replicate policies between sites. The \\domainname\NETLOGON directory, which exists on all domain controllers, can also be used to locate MSI files on and automatically replicate them between sites.
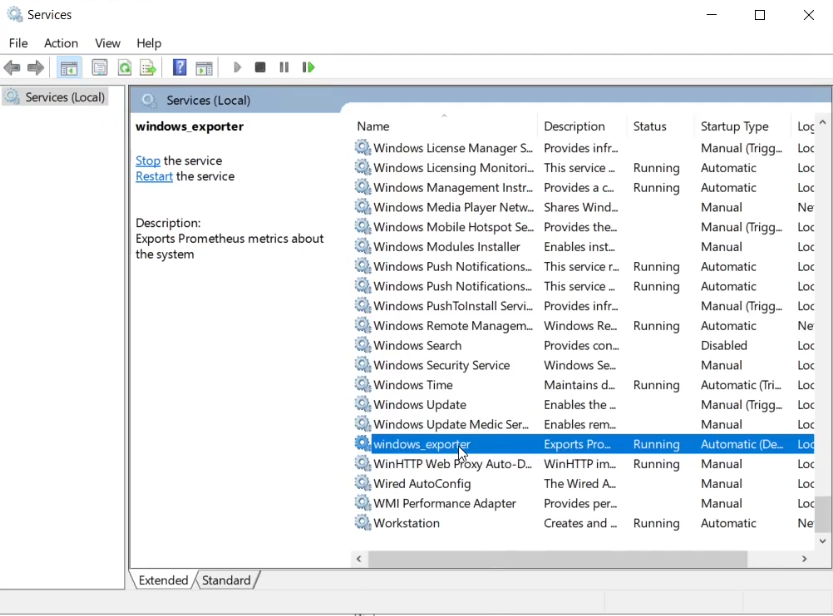
When the software has been installed, you should see this as “windows_exporter” in the Services menu.
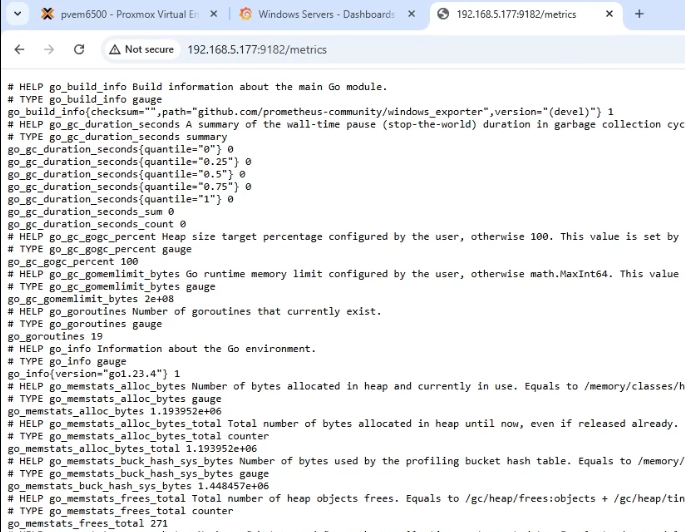
Metrics should be visible at http://serverHostnameOrIP:9182/metrics - make sure these are accessible before adding the configuration to Prometheus.
Prometheus Update
With the Windows Exporter(s) running, you should update your Prometheus configuration - this is exactly the same as described on the Windows and Linux monitoring post here.
Demonstration Video
A demonstration video of the Active Directory deployment can be found here: